| Home Page
Download my maps here
Adding DC.39k statics and vehicles.
Adding EOD vehicles-chopper
Sounds and Skyboxes
Adding the JU88a
Adding GC statics and vehicles
Adding Hydroplanes and arrow boats
Converting maps after BC
Map specific textures
Map conversion
Gmakerfa...objects.rfa
How i use photoshop 7 with BF1942
Make your own signature
Adding DC 4j vehicles and statics
Changing the Menu
Editor42 ver 4 setup
|
This is how i use photoshop 7 to redo my BF and other mod textures
OK .....the first thing you need to do is make a new folder in the main folder of your extracted map
name it customtextures
this is where we will be placing all our newly redone textures
now with notepad open the init.con file in your extracted map
now put this line in there
texturemanager.alternativepath ../../bf1942/levels/"your map name here"/customtextures
now i am using photoshop 7 ..
now open photoshop(i'll call it PS7 )
now i also use adobe photodeluxe He 3.1 for some pictures ...
Now what i did was go online and search for pictures of what your going to use for your retexturing
i put in flags and found a site with a picture of flags and right clicked on the picture and chose save as and save to a folder i made called newtextures i made on my desktop
i wanted to use the flags so it looked like there different flags
in there..figuring out how the texture wraps is the hardest part,but after you do it you'll start to see how it wraps..(all must be .jpg format)
if you havent already you need to extract the textures.rfa from all the mods you are going to do or use (mods/BF1942/archives/texture.rfa (change highlighted word for each mod)
it makes a folder in the c:/ drive (c:/textures) and all texture.dds are in there
now go to c:/textures and open and look in the textures for flags_0.ddsthis is the flag texture
now copy and paste it into your customtexture folder in your extracted map
now open PS7 and click on file then open and then go to c:/bf1942/levels/yourmapname/customtextures folder and select the flags_0.dds and when it asks to use mip maps select NO
now click on file then open and go to newtextures folder on your desktop you made and DLed the pictures from the internet into
now find the picture of the flag you want to use
select the flag and now you should have the flags_0.dds and the flag you want to use side by side
now click on the picture of the flag your going to use and if its bigger than the flags_0.dds click on image then image size and resize until its just a little smaller than the flags_0.dds picture
now over in the side toolbar you need to select the clone button
now with your pictures side by side put your pointer arrow over the picture your going to copy from and hold down the ALT key and it will change to a circle with an X in the center of it
now while holding down the ALT key left click once to set the copyfunction (i usually start dead center of the object in the picture i'm going to use )
now move your pointer over the picture your going to copy onto
now hold down left click on your mouse and paint the picture onto the picture your changing.....now go slowly and paint in as much or as little as you want....on the flags just paint the whole flag area and the way you paint it is the way it will show up
with faces i start with the lips (center) anything else just start in the center and then when you are copying the picture over start in the center of where you want to change...ok now some pictures for illustrations below...then i will talk about adobephoto deluxe at the bottom and how i use that...
|
|
|
. |
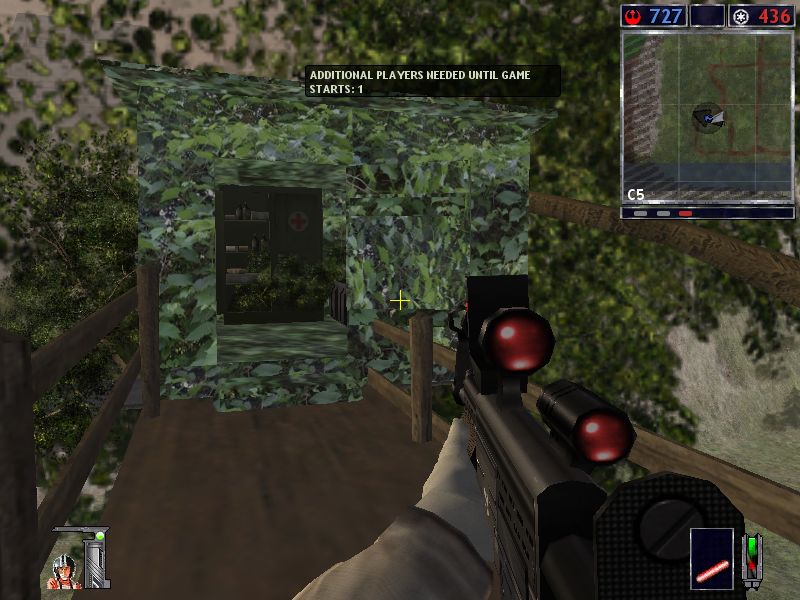
Camo Shed..from battle for endoria map....GC MOD...
what i did here was to go outside with my digital camera and get some pictures of
bushes
small stones (driveway type)
grass
vines..etc
now i opened the shed.dds files in PS7 and then opened the picture i took of the vines and sized them to fit the shed the best in size and clone the vine image onto the shed.dds pictures
now you can set the opacity to you liking ( how much it will cover the existing picture)100% means it will cover it totally...10% means it will cover the existing picture but still be able to see through it
I used 100% for this...wanted to try and blend in with the trees and think it came out quite well...ok next example |
|
|
|
|
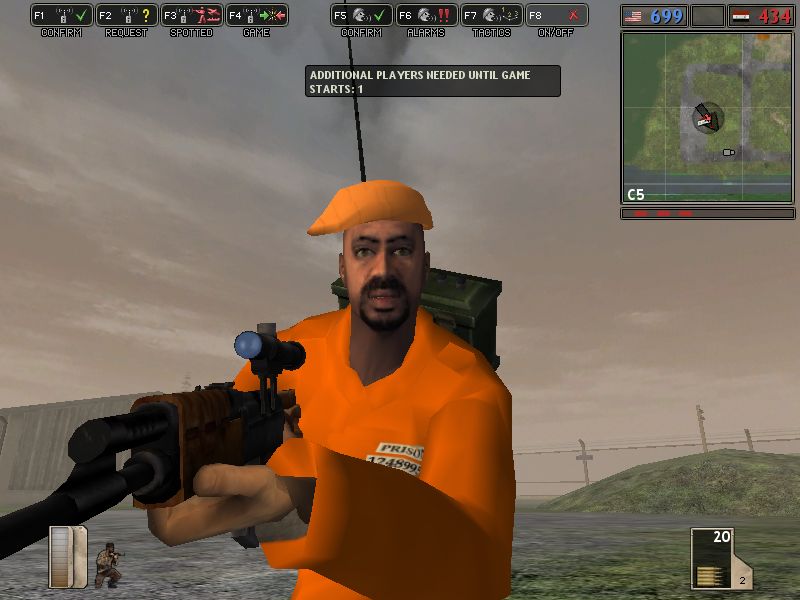
Messin with faces and clothes (uniforms)
Basically after you clone your first .dds file it just gets easier to do...experiment and always use a copy of the .dds file not the origional one..or you'll have to extract a whole new texture set...this is supposed to be Zacaria Moussaoui from the 9/11 disaster...i put him in my new DC .39k map called "Prison camp lockdown" due out anytime...other guest iraqi apperances are Saddam Hussein and Osama Bin laden..
Now with the map i needed the prisoner feel so i used the typical orange color they used for the iraqi prisoners and gave them sneakers also..
just open them in PS7 and choose the paint brush in the tool bar and choose the color you want to use then set the brush size to the size you need and paint until you feel its done and remember Opacity when painting
now place all the textures you have redone into the customtextures folder you made in your extracted map and then pack up your map using rfamaker (not gmakerfa) and then place in the levels folder of the mod your using for your map and play and see your new textures..
Any textures in that folder will over ride the origional .dds files
Faces
face_ame1.dds
face_ame2.dds
face_ame3.dds
face_ger1_h.dds
face_ger2_h.dds
face_ger3_h.dds
Clothes
ame1_sleeve.dds
amerov_z.dds
amerun_z.dds
ger1sleeve.dds
germov_r.dds
germun_r.dds
These were examples of what to look for in the textures folders
|
|
|
|
|
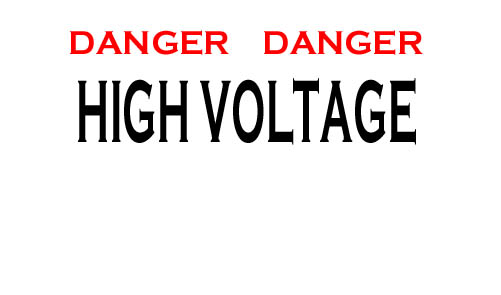
what i use adobe photoshop for:
OK I needed wording to go onto my signs so i use adobe photodeluxe to do this...you can do this in PS7 but i find it easier to use this program..(you may also have a program that will do this and you can use any progran you feel comfortable with just so it will save to jpeg format)
now the sign above ,i needed a high voltage sign so it was easier to make one than search the web for a picture of a high voltage sign...so first i opened the program and selected new then chose my font i wanted to use for the wording and then typed in the words i needed
you can make the words any color also...now after you have put all the words you wanted you will want to trim the picture so it is the size you want....if you leave it bigger than you wanted you will have to work on getting the edges straight and its a pain so if you trim it here it will only clone the exact picture your copying from...no overlay...as you go you will understand each process more...now after you have finished the new wording/pictures click on file then save as (i have to use export)and save as JPEG format into the desktop folder you have the textures in...now it will be saved there to use when you open PS7
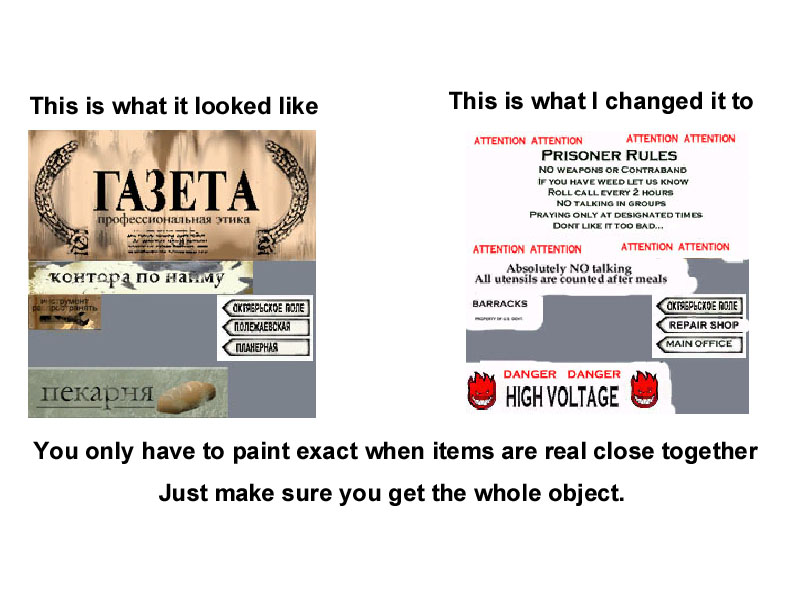
now open PS7 and open the signs.dds files (examples below) and clone your new wording onto the sign.dds picture...remember about sizing your image to fit the existing picture..
|
|
|
|
|
|
|